There can be no trifles in preparing for a wedding; the first step after choosing a date should be sending out invitations so that dear and welcome guests can plan their time in advance. Of course, the easiest option is to buy or order invitation cards from a printing house, but then they are unlikely to be individual.
Do-it-yourself wedding invitations carry good energy: even if you make all the invitation cards the same, you can add small details to some of them “tips” so that relatives and friends understand that this was done especially for them. Making invitations is a lot of fun, involve your significant other, girlfriends and friends in this activity, handicrafts bring you closer together and at the same time can reveal hitherto dormant talents. Who knows, maybe deep down you are an artist, designer or folk craftsman?
The invitations must indicate the names of the newlyweds, guests, wedding date, time and place of the ceremony and wedding, where the banquet will take place, and so on. In fact, an invitation is the first impression guests have of the upcoming celebration, so it’s worth trying.
So, we bring to your attention several ideas and small workshops on how to make a variety of wedding invitations with your own hands.
Card with ribbons
To make such an invitation you will need: 2 multi-colored sheets of thick paper, ribbon, double-sided tape, beads, a stationery knife, and a color printer.
The tape width is approximately 7 mm, paper density is 230 g/m.
For the outside of the card, cut out a 12x12cm square.

Take a sheet of A4 paper, draw a pattern or drawing on it, or choose a ready-made one on the Internet and print it out.

Conventionally, you need to divide the invitation into 3 parts: the name of the guest is written on the left, your signature on the right, and the invitation itself in the middle. It is better to use a ruler to bend thick paper.
Cut 2 pieces of tape, 15-18 cm long. Using double-sided tape, glue one piece on one side of the base, and the other on the other side of the base.

Now we glue the squares to the finished background with the pattern (you can do this using double-sided tape or regular glue).

We tie the ribbons onto a bow, after inserting them into the bead. The card is ready, you can send it to recipients!

Card with heart

To make it you will need: sheets of thick paper, decorative braid, sequins, nylon roses for decoration, gold or silver marker (better choose one with a calligraphic tip), glue.
You choose the shape and size: the postcard can be round, square, rectangular or even complex in shape. On the front side there will be a “heart”, the contours of which are drawn with a simple pencil.

We glue braid, sequins, and roses along the contour. You can also use decorative lace, twine, cords and more. In the center of the heart we write the word “Invitation”, we decorate the rest of the card by hand: you can use simple curls and patterns, you can use stickers, you can use drawings or stencil painting - it all depends on your imagination. We write the invitation text inside and hand it to the guests!

Envelope with a secret

A regular landscape sheet needs to be cut in half. We fold one half three times (we wrap the edges towards the center). Using embossed scissors, you can make patterns and cut off the top corners.
We cut out a rectangle from paper of a different color, approximately 7x10 cm in size, and write an invitation on it. Insert it into the envelope.
Using a hole punch, make two holes along the edges of the envelope and invitation, thread a ribbon through it and tie it. You can decorate the envelope with decorative stamps and drawings.
Also make lacing on the envelope itself, so it will look prettier.
Scrolls

You can make invitations in the form of scrolls; they are artificially aged in a solution of strong tea or coffee, and lightly scorched along the edges with a candle to give the paper a special texture. If you wish, you can put hieroglyphs and strange symbols on the scroll - this will make it look more interesting. However, you can limit yourself to typical wedding symbols - doves, hearts, rings. The edges can be processed with embossed scissors; the scroll can be decorated with compositions of artificial flowers, lace, ribbons, and beads. Then we rewind the invitation with ribbon or twine and send it to the recipients.

Posters and newspapers

Unusual invitations in the form of a poster will appeal not only to the newlyweds, but also to their guests. All you need to do is make invitations on your computer, add fun photos and type the text in calligraphy. After that, print the card and put it in an envelope. Voila, simple and interesting.
You can make the invitation in the form of a newspaper: place a large ad with photographs of the newlyweds on one part, and fill the empty spaces with interesting stories and funny stories about acquaintance, first dates, and the life of the future spouses. True, in order to do this on their own, some of the young people need to have a good knowledge of the features of layout and be able to use a computer.

Sweet invitations
If families with children will be present at your celebration, then the invitation should be interesting to everyone. To do this, you can arrange the invitation itself in the form of a small note and place it in a self-sewn bag. To do this you will need organza (cut out a 10x20 cm rectangle, fold it in half and sew it together). The bag can be tied with a rope or a ribbon sewn into the top. We decorate with sparkles, artificial flowers, and beads. And most importantly: add candies or dragees for those with a sweet tooth. Both interesting and tasty.

Wedding invitations using quilling technique
The quilling technique is not the easiest, but if you wish, you can create real masterpieces. We bring to your attention detailed master classes on making invitation cards of different styles.

To create such an invitation you will need thin strips of paper (width 3 mm, length 30 cm), designer cardboard (white and lilac or any other colors), a stationery awl, scissors, a picture with a silhouette of the bride, a knitting needle, glue, ruler, pink paper, the printed word “Invitation”, however, it can be written manually.

We print or write text on white cardboard. For example, like this:

On the right we place the silhouette of the bride (if you are good at drawing, you can do without a stencil). Invitation size 12x32 cm.

Using a ruler, measure the middle of the invitation and draw a line with the blunt edge of a knitting needle (carefully, do not cut the cardboard), bend the card in half.

Open the invitation, retreat 2 cm on the sides and 1.5 at the bottom and top, then paste in the pre-printed text of the invitation.

We trace the top of the bride's dress (you can use tracing paper for this), cut it out according to a template from white cardboard, and glue it onto the dress. We take strips for quilling (you can make them yourself from a regular white sheet of paper), carefully wind them onto a thin awl or knitting needle, holding them with your hand so that the strip is well wound.
We get these blanks (we fix them with glue so they don’t fall apart), and glue them onto the bride’s dress.
Apply a drop of glue to the paper, and then press one side of the circle against it and hold for several seconds. We repeat the procedure until we fill the entire outline of the dress.

Now we make a bouquet. Draw a spiral like this, cut it out and glue it onto the postcard to make a three-dimensional rose.

In the upper left corner we paste the word “Invitation”; you can decorate the card with ready-made die cuts, which you buy in craft stores. The postcard is ready!

Another variation in the quilling technique will appeal to lovers of vintage style. To make an invitation card we will need: cardboard, quilling paper or just colored paper, an openwork napkin, beads, ribbons, glue, a figured ruler, 2 skewers (thicker and thinner), scissors, a lighter.
Using a ruler, we divide our postcard in two, measure the center of the fold and draw it with the blunt side of the knitting needle - then the postcard will open easily.

Now we take a paper napkin - it will be a kind of openwork frame. Glue it to the front of the invitation.

We make flowers from the lace, and to prevent the ends from becoming fluffy, they need to be burned with a lighter. We fix it with glue so that it doesn’t fall apart, and twist it in a spiral.

Glue it inside the outline of the card.

We begin to wind strips onto skewers (awl, knitting needle): the wider the skewer, the larger the element will be.

We give the desired shape (the easiest way is to insert the workpiece into a figured ruler, so it will not fall apart, and then fix the turns).

Glue the finished decor onto the card, pressing down well so that it does not fall off.

We cut out a butterfly from paper or a piece of fabric (however, you can use a regular sticker), decorate it with beads or seed beads.

We glue several lace pieces, beads, and make a bow from the ribbon.

A beautiful DIY postcard is ready!

Scrapbooking technique and wedding invitation

If your wedding is quite modest, you can make invitation cards using a more complex technique - scrapbooking. You will need thick paper with a pattern, plain paper for the base and decoration (braid, beads, artificial flowers, etc.). It is better to extrude the text with a special guillotine knife, and not with scissors or a knitting needle - they leave kinks.

Glue the paper with the finished pattern to the base using double-sided tape.

We pass the ribbon through the holes. By the way, it is better to use stationery tape; construction tape has a specific smell, and glue can leave sloppy stains.

Tie a bow from the ribbon and attach decorative elements under it with glue.

Stylish invitation card is ready! All that remains is to write the name of the guest and yourself
Depending on the style of the wedding, the invitation can also be themed: for an oriental-style wedding, a postcard in the form of a fan or a scroll with hieroglyphs would be appropriate; for a beach style, a message in a bottle or a postcard in the shape of a flip-flop would be appropriate.

Vintage style - brooches and lace, baroque style - three-dimensional designs, ornate ornaments, a lot of gold and sparkles, eco-style - all kinds of leaves, berries, grains, seeds and other gifts of nature!

Imagine, create, and your wedding celebration will be individual in every way!
Today I want to tell you about how to make an envelope for money for a wedding from paper with your own hands. Thanks to the free templates provided, creating such an envelope is not particularly difficult, and a step-by-step description with photos will explain how to make it correctly.
Tools and materials Time: 30 minutes Difficulty: 3/10
- kraft paper;
- printed templates with floral design and envelope;
- scissors;
- stationery glue or PVA;
- pencil and ruler.
Wedding season is approaching and many brides around the world are getting ready to celebrate it. This day will remain in memory for a lifetime, so every detail is thought out to the smallest detail. So much effort goes into it, and sometimes a wedding can be very expensive! Wedding invitations and envelopes are part of the worries. They must be special and impeccable! Fortunately, you can save money here by making your own wedding envelope.

Believe me, your guests will love your wedding invitation found inside a stunning handmade envelope that you created yourself! Made from kraft paper, with an attractive floral design on the inside, it will give a big “wow” factor when your invitees open it! Oh, this is honey for the eyes!

Consumables:

Templates:
Step-by-step master class
So let's get creative quickly.
Step 1: Fold the Envelope
- Take the template with the printed envelope and cut it out.
- Place the template on the craft paper and trace it with a pencil. Carefully cut out the workpiece.

Fold forward two opposite corners to the dotted line of the rectangle with the smaller sides. Then fold the bottom flap forward. Leave the craft for now.


Step 2: Cut out the printed piece
Print out the floral design on a sheet of A4 paper. Place the envelope template on the back of the print and trace it with a pencil.

It is not necessary to use the floral design from the template. You can take any paper with a design you like and apply it.
- Draw lines with a pencil on the reverse side of the print as shown in the photo. At the top of the “house” also cut off the “roof” to a width of 5-6 mm.
- Cut the paper along the indicated lines.

Step 3: Glue the Print
Attach the “house” to the kraft paper envelope blank. Carefully glue the paper exactly in the middle to the fold lines.

According to the famous saying, theater begins with a hanger, and wedding invitations are considered the beginning of the wedding celebration. Photo and video tutorials from professionals will help you create mini-masterpieces. These paper invitations are far from trifles, but a small backstory of a big bright future, the face of your future holiday. You can, of course, get by with beautiful ready-made samples from a printing house, but imagine how surprised and delighted guests will be when they find not stamped postcards, but messages with a piece of their soul embedded! In this article we will tell you all the secrets of creating wedding invitations and.
DIY wedding invitations. Where to begin?
First you need to think about the general theme and nuances. Usually, for each wedding a certain theme is chosen, which determines the interiors, outfits and invitations. Having decided on an idea, it’s worth working out templates that will help simplify the process and quickly produce messages for a large number of people.
Wedding invitations. Templates
Let's go from simple to complex: let's start with a handmade postcard in an envelope. We buy a set of beautiful paper, form identical books from the sheets, paint them according to the theme, and write text inside. To make the task easier, you can take a thick rubber sponge, cut the necessary patterns in it, dip it in regular black ink and stamp different lines in the same places (see photo).
Advice! Stationery stores sell beautiful ready-made stamps that you can purchase and use to design your postcards.
In this case, it is better to choose a contrasting option - black and white or white and red, etc. The main thing is the content; Against the background of external simplicity, the text should win.
Chic, shine, beauty
On the one hand, this is the vocabulary of Ellochka the cannibal from “12 Chairs”, on the other hand, sometimes you really want an extravaganza. In this case, once in a lifetime, rhinestones, feathers, silk ribbons, etc. will not harm. We cut, glue, write - here you no longer have to think through the text very carefully, it will still be eclipsed by the luxury of the radiance of the outside. A short and catchy line is enough, something like “Vasya and Katya invite you to the best wedding ball of the 21st century.”
Simplicity can also be original - consider this 3D version of invitations.
From flat standards to volume
- Magic boxes. Today, many budget stores sell different sizes of plain cardboard gift boxes. This is great material to start making magic happen. All that remains is to buy satin ribbons, sets for with various figures - ladybugs, flowers, hearts, etc. on self-adhesive film. A couple of evenings - and the stack of invitations is ready; Now all that remains is to type it on the computer, print it out, or write the text by hand together with your chosen one. We put them into boxes and hand them over to the recipients - Russian Post, personal transport or a courier service can help us.
Advice! If you send invitations by Russian Post, do so in advance, taking into account a possible one-week delay. If you cannot afford a courier service, you can involve several friends in the delivery process in their personal vehicles under the strictest condition of non-disclosure of secrets.
- Funny bottles. Many couples prefer to have an outdoor wedding. If you are planning to get married near the sea or an ordinary river, use the idea with invitations in the form. Decorative glass containers are also sold in many budget stores. Some of them look like a work of art at an inexpensive price. All that remains is to write the invitations, roll them into a tube, place them inside, sprinkle in a few decorative starfishes and “pearls” for beauty – and voila! Happy sailing to your destinations.
- White mitten. Borrowing the idea with socks for Santa Claus, we sew the simplest satin gloves, like potholders for a frying pan, only thin and small. We embroider with rhinestones, mini-flowers and other decorative elements. Inside we put scrolls with the text “We entrust to your kind hands the atmosphere of our most important thing, you are invited to a wedding there and at such and such a time.”
- Unexpected sweetness. A simple and yet brilliant idea - personalized cupcakes with hearts. We buy these mini-cakes, include invitations and send them to our friends. The only negative: this option is suitable only for residents of one city.
- Thanks for the chocolate. Having purchased good chocolate in bulk, you can remove the factory wrapper from it and replace it with the image of your happy couple and the date and location of the wedding.
- Adorable bags. Organza came to us from the East, but was loved by all countries of the world. For original invitations, just buy a few meters of organza and sew small bags. The costs are minimal, but how much delight the iridescent fabric causes!
- Sweets with a surprise. You can buy multi-colored gift wrapping and decorate the invitations like funny candies, tying the ends with bows.
- A huge heart is enough for everyone. Option for needlewomen: Thick fabric such as felt is bought, marked and cut in the form of a puzzle, a word is embroidered on each of them, and as a result a whole inscription or picture is made. This is a fun game for adults! Such a heart can be placed at the entrance on a large table, and each guest will have to bring a piece to create a whole composition.
Advice! If you took a heart-puzzle as an idea for invitations, take the time to duplicate it, because one of the guests may forget or lose the invitation. Duplicates will help bring your idea to life without any incidents.
Unusual DIY wedding invitations
Modern trends have not stood aside, and today interesting ideas with fashionable names have come to us from different countries. Do you want to surprise? Try scrapbooking.
Quilling
This is the art of decorating something using paper strips. The whole secret lies in twisting them in a certain way.
You will need:
- two sheets of paper - thick and thin;
- ruler;
- scissors;
- glue;
- stationery scissors;
- pencil;
- colored paper;
- quilling tool;
- half beads;
- satin ribbon.
Advice! It is much more convenient to buy a ready-made quilling kit than to assemble it yourself in parts.
Progress:
- We cut thin identical strips, about 15 pieces for each of the cards. We roll them into “rolls” using a quilling tool. We fix one end and wrap the second one around the tool. Secure the free edge with glue.
- At the same time, we glue colored paper for the background onto hard paper, attach flowers to the card, and make leaves. If the finished “roll” is flattened on both sides, you get a sheet.
- We attach beads to the center of the flowers, roll a bow from a satin ribbon and glue it too. You can further decorate it with additional details to your liking.
- There is a simpler, but no less beautiful option. We draw a branch on the sheet, frame it with braid along the contour, twist the hearts, fasten it and get a branch with wedding hearts.
Old scroll
Lovers of heirlooms and antiques can make a wedding invitation in the form of ancient papyrus rolled into a tube.

Papyrus invitations look quite mysterious, because when we unroll the aged paper, it’s as if we are touching something eternal
Envelope- This is just a shell or packaging for inserting various objects or papers. Basically, we are used to thinking of an envelope as a “packaging” for letters or documents. But there are also envelopes made of thick fabrics or blankets for newborns.
Today we will learn how to do envelopes for different needs and let's start, perhaps, with the most common envelope - a paper envelope.
How to make an envelope out of paper?
The simplest envelope can be made from a square sheet of paper by folding the corners towards the center. To do this, you will need a square sheet of paper of the desired size, a ruler and a pencil.
1) Check the very center of the sheet point, measuring the distance to it using a ruler.
2) Fold the left and right sides inward so that the corners touch center point.

3) Then fold the bottom side up so that it covers the center and can be glued to two already folded corners.

4) Apply glue to the bottom sides of the envelope as shown in the photo. You can also use double-sided tape.

5) Fold the top corner down. The envelope is ready! This envelope can be made in just a couple of minutes. It is based on the simple principle of adding angles. Here are a few more schemes for making envelopes from sheets of different shapes:

Diamond envelope

Envelope "from the heart"

Envelope with a square
Beautiful envelope with your own hands
To make your envelope look beautiful and original, it can be made from several types of colored paper. The easiest way to decorate an envelope is to use different types of paper for the outside and inside.

To work you will need:
- 2 sheets of colored paper
Old envelope as a template (optional)
Double-sided tape or glue
Ruler and pencil
- Scissors

Let's get started:
1) Cut from a sheet of colored paper blank for the outside of the envelope. To do this, you can use a ready-made template, or draw a template yourself using a ruler and pencil. Choose the size of the envelope at your discretion, depending on what you are going to put in it.

2) From another sheet of colored paper, cut out blank for the inside of the envelope.

3) The inner part should match the size of the outer part, but should be slightly smaller so that it can be easy to paste inside.

4) Using tape or glue, glue internal part.

5) Fold the edges of the envelope inward and seal them so that to prevent glue from getting into the inside.

Envelope templates
With this template you can make envelopes from colored cardboard:

By adding a ribbon, you will have envelopes for different occasions: For greeting cards, money, invitations, etc.

Sample long envelope:

Envelope template on A4 sheet:

You can decorate envelopes colored lace or appliqués:

Can be used beads and threads to close the envelope:

Envelopes are sometimes decorated with various paper parts, made in various techniques: origami, quilling, scrapbooking, etc.

More details about quilling technique you can read.
More details about paper flowers you can read.
DIY origami envelope (video):
DIY money envelopes
What could be more banal? gift in the form of money, but sometimes this is the only thing that comes to mind. To make your gift unique, you can place it in handmade envelope. The envelope can be beautifully decorated and signed like a postcard.

Money envelopes are usually made of cardboard and have an elongated shape so that the bill could fit in it completely. You can draw the templates yourself or use ready-made templates:
Envelopes for money (templates):


We offer you some useful ideas on how to make and decorate money envelopes that will become great gifts along with their contents.
Gift envelope for money
Are you going to a birthday, wedding, christening or other event? Then an envelope for money will come in handy! This original handmade gift will definitely please your loved ones.
Option 1:
This simple money envelope can be made from colored paper in several colors and satin ribbons. It looks very festive, and its production will not take you much time.

To work you will need:
- 2 sheets of colored paper (one with a pattern, the other plain)
Ruler and pencil
Satin ribbons in 2 colors, 1 cm and 0.5 cm wide
Matches or lighter
- Scissors

Let's get started:
1) Prepare paper and ribbons so that they match each other in color scheme. The author of this master class used to make an envelope regular wallpaper, the trimmings of which remained after the repair.
Before you begin, measure the desired size of the envelope, its width and length. In this case, a rectangle of plain paper was used measuring 20 by 40 centimeters. Fold a sheet of paper with the edges inward in the center, as shown in the photo:

2) Fold sides inward to the center.

3) Unfold the sides and fold in the corners in the form of a triangle.

4) Unfold the envelope and stick on a rectangle of colored paper measuring 20 by 23 centimeters in the center of a sheet of plain paper.

5) Fold superfluous inside the envelope.

6) Side corners in the form of triangles stick with glue to the bottom of the envelope.

7) Satin ribbon 1 centimeter wide glue in the center on the back and front of the envelope, leaving the ends to make bow.

8) Place a narrow tape over the wide one 0.5 centimeters wide, also leaving the ends for the bow.

9) Process the ends of the tape fire so that it doesn't fall apart.

10) Tie ribbons with a bow. Your original money envelope is ready.

Option 2:
Envelopes for money or other surprises can be made not only from paper, but also from fabric. We invite you to learn how to make an original gift felt envelope, in which you can place money or a discount gift card.


To work you will need:
- Several small sheets of colored felt
Thick wool thread for knitting
Buttons
Ruler and pencil
Pins
- Scissors

Let's get started:
1) Using a pencil and ruler, measure width of the future envelope depending on what you put in it. If it will be a discount card, attach it to the felt and measure on both sides 1 centimeter for seam.

2) Cut rectangular piece of felt, then bend the lower part and pin it with pins. Insert the card inside to determine the size of the lid.

3) Cut off the top superfluous.

4) Finish the edges with threads, making U-shaped stitches. It is better to use threads in a contrasting color.

5) Cut out of green felt three small Christmas trees or any other details.

6) Glue the Christmas trees with back outside of the envelope. Sew small buttons on the tops of the trees.

7) From the outside of the front of the envelope at the bottom sew on a button, and attach to the edge of the lid threads so that the envelope can be closed and tied with a bow.

Money envelope scrapbooking
This envelope using the scrapbooking technique is easy to make at home using parts cut out of paper. Scrapbooking– a technique for decorating photo albums, as well as various other products using paper applications, beads, etc.

To work you will need:
- White cardboard (23 by 23 centimeters)
Colored paper (23 by 20 centimeters)
Colored paper of a different shade or pattern (8 by 14 centimeters)
Plain thin white paper or thin lace
Satin ribbon 35 centimeters long
Details for decorations (butterflies, rhinestones, beads, etc.)
Ruler and pencil
Matches or lighter
Sewing machine and thread
- Scissors
Let's get started:
1) Using a ready-made template, cut out from white cardboard blank for the future envelope.

2) Cut out of colored paper two rectangular blanks, which will match the tops of the envelope. The blanks must be by a few millimeters less base so that they can be easily glued and so that they do not extend beyond the edges.

3) Cut out from paper of a different color two more blanks of the same width, but shorter - this will be the middle of your envelope.

4) Glue on the sides of these parts lace frill. You can use paper lace or very thin lace ribbons.

5) Glue the lace parts to larger colored parts.

6) Glue all the parts to outside of the envelope on the outer main cover and on the inner cover. Then go around the edge with your sewing machine. zigzag seam. You can also glue the colored part onto the back outer side of the envelope, and then process it on a sewing machine.

7) Before gluing the colored part to the back, insert between the part and the base satin ribbon.

8) Tie the ribbon in front with a bow and glue it on the outside over the ribbon rectangle of thin white paper with an inscription.

9) The final touch: decoration additional details.

DIY wedding envelope
The best wedding gift is money that can be placed in beautiful handmade envelope.

To work you will need:
- A sheet of white thick A4 paper
Light colored paper
Decorative cord
lace ribbon
A piece of thin translucent fabric
Details for jewelry (flowers made of fabric or paper, pendant in the form of a key, beads, etc.)
Double sided tape
Ruler and pencil
Sewing machine and thread
- Scissors (regular and curly)

Let's get started:
1) If your colored paper is not very thick, glue it on a sheet of white paper A4 format and let dry well.

2) Using the template provided or any other template, draw on the back of the sheet outlines of the future envelope and make a pattern. The folds are indicated by the blue dotted line.

3) Cut out the pattern. You can use curly scissors.: tie the ribbons and cords with a bow, make a flower from transparent fabric, attach a cord to the key-shaped part.

9) Glue the lace tape at the top of the part, grabbing the lace, which will wrap around the envelope, so leave a suitable length for this. Glue decorations to the bottom triangular edge of the piece.

10) To be safe, go over the line glued lace tape.

11) Glue the part to outside of the lid envelope.

12) Wedding envelope for money is ready! Inside it will look like this:

Money in an envelope: original ideas
With envelope design you can place the money inside in different ways. Here are some ideas to help you make original envelopes. For example, you could use postcard, inside which paste a small envelope with money. You can write wishes on a card, and, looking inside, the recipient will find there cash gift.

Another option is to make the envelope also in the form of a postcard, and inside attach satin ribbons that will hold the bills.

Book of envelopes. This original idea will appeal to those who would like to learn how to save money. You can make some simple envelopes and sign them, indicating the purpose for which the money is stored in them and the time when it can be spent.

DIY CD envelope
Compact discs require careful handling, so it is better to place them in special cases, boxes, envelopes, or store them in a disc album. You can do simple ones CD sleeves yourself from paper.

To work you will need:
- A4 sheet of paper
-Glue
Let's get started:
1) Place the disk to the bottom of the sheet.
2) Fold the sides of the sheet in straight lines, using the disk as a guide.
3) Bend the disc with the paper up, turning it over to the other side.
4) Fold the top part, closing the disc inside the envelope.

5) Take the disc out of the envelope and glue it internal parts so that there is a pocket for the disc.
6) Fold down and inward cover corners.
7) Insert the cover inside the pocket.
8) The simplest CD envelope is ready!

If you want to do congratulatory CD envelope, then you can use the previous tips for making envelopes, only make the envelope large enough to fit the disc. Here a few examples original gift envelopes for discs:


Preparations for the wedding begin with invitations. Guests should receive wedding invitations as early as possible, preferably a month before the celebration, in order to be able to calmly prepare for the festive event.
Invitation cards can be bought in wedding salons or ordered from a designer; fortunately, the choice of them today is simply huge.
But, if you want your guests to appreciate your respect and special attitude towards them, and to keep the invitation for many years as a memory of your wedding, then you need to make sure that the wedding invitation looks unusual.
How to make a wedding invitation with your own hands
The most extraordinary, unusual, unique wedding invitations are obtained only when they are made by yourself, with your own hands.
Let's remember how in childhood we cut out, glued, and decorated holiday cards, take the necessary materials and tools in our hands and get to work.

Simple wedding invitation “three windows”
With our new Master Class in just 10 minutes!

Try this creative and simple wedding invitation!
Vintage wedding invitation with lace and bows


Wedding Invitation Crossword
Fans of intellectual games will certainly like the invitation in the form of a crossword puzzle. In order to make such an invitation, you will need crossword puzzle questions and one of the programs that can create puzzles.

Original ideas for wedding invitations
For those who love original wedding ceremonies, you can also make appropriate invitations.
Invitation as a memory of the sea and the beach
If you decide to organize your own, then prepare wedding invitations in the appropriate theme.


Wedding invitations for fans of air travel

Fishing lovers will appreciate these wedding invitations

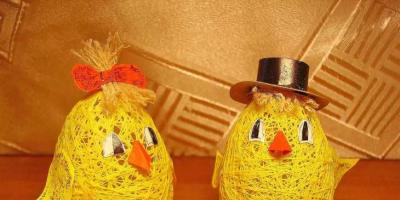
For fans of circus art
If you are a big fan of the circus and have decided to create your own, then you will definitely love this cute wedding invitation with elephants!

For travelers and car enthusiasts

For lovers of sea cruises

Wedding invitation in the form of money: family bank of newlyweds
All guests will appreciate such dollars. 
Wedding in the best traditions of Las Vegas

Also, these playing card wedding invitations are perfect for! If there are a large number of relatives, in order not to confuse the guests of the older generation, you need to make several options for invitations.
In this case, you can give original invitation cards to your friends, and invitations made in a classic style to your elderly relatives.


Wedding invitation texts
The text of the invitation is of great importance, it must correspond to the design of the invitation card, so the text can be simple, or it can be unusual, for example, in verse:
Dear Aunt Olya and Uncle Misha!
We decided to unite our destinies and hearts.
So, dear ones, allow me to invite you to the wedding.
We will be immensely glad to see you, we will consider your visit an honor
At noon, April fifth, on Sadovaya, in the house six.
In any case, the text of the invitation must take into account the following points.
- At the very beginning, the names of the guests are indicated in the form in which you are accustomed to addressing them, and then the text of the invitation itself follows.
- The celebration in honor of which guests are invited is indicated.
- Date and time of the wedding.
- Venue of the celebration.
- Names of the newlyweds.
- If you wish, you can draw a map of the route to the ceremony location.